This guide will show you how to spend the smallest amount of energy to tend to the largest amount of plants through plant stacking using the 69 single layer plot method.
The method is especially useful for anyone who is trying to farm large amounts of mega snacks, treasure cards, gold, or reagents.
Wizard101 Plants stacking
| Items | Where to purchase | Required Item? |
| x1 Long Blue Runner | Bazaar | Yes |
| x1 Low Square Table | Bazaar or Zhi Lan (Mooshu Furniture Vendor) | Yes |
| x4 Crate of Jellybeans/ Pumpkins/ Icecream /Hotdogs | Bazaar | Yes |
| x1 Tatami Floor Mat | Bazaar or Zhi Lan (Mooshu Furniture Vendor) | Yes |
| x1 All of your plants likes | Misc. | No |
| x1 Plant All (TC or Spell) | Check out All Plant Spells | No |
Setting up
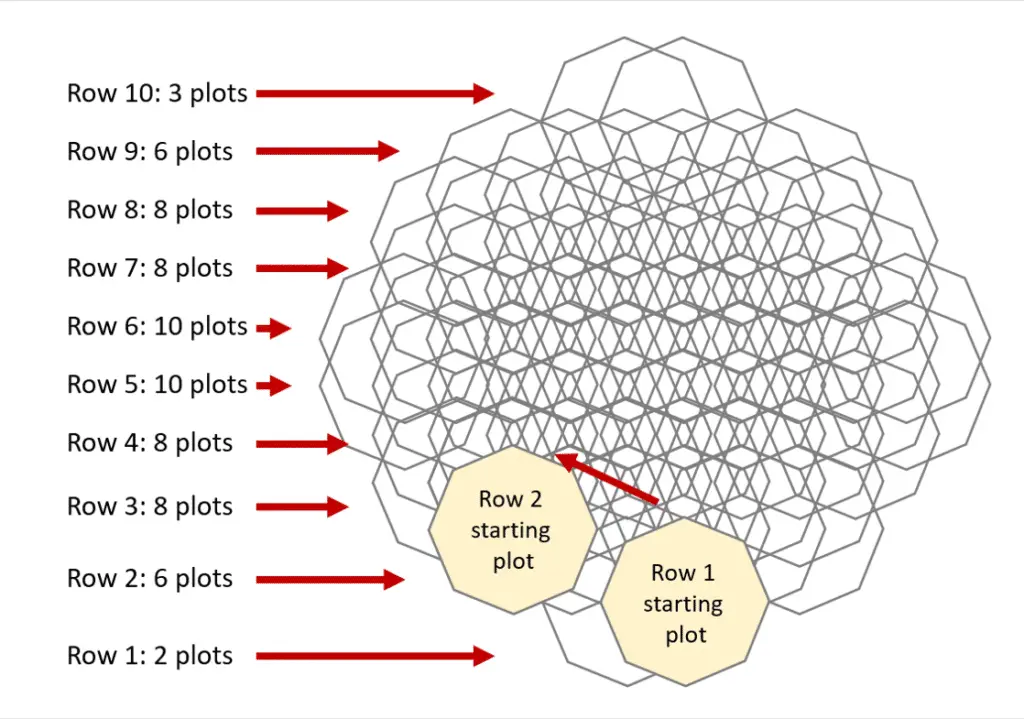
To start plant stacking and creating the 69 single layer plot, we’ll need to create a total of 10 plot rows. We start off with:
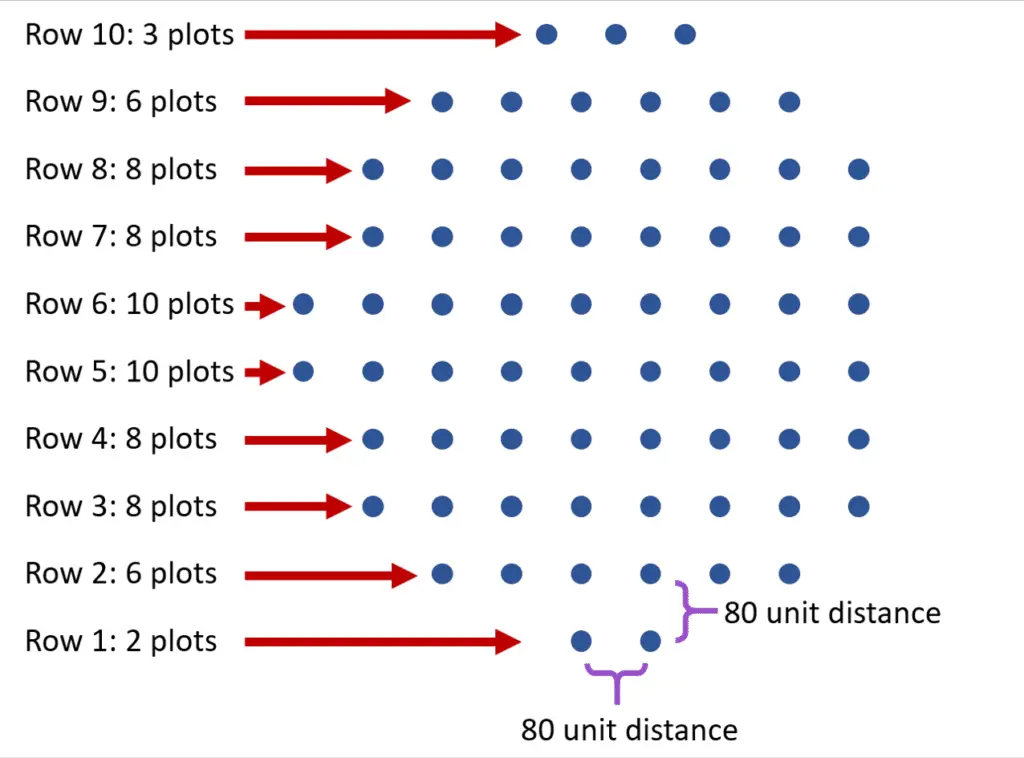
- 2 plots on the 1st row
- 6 plots on the 2nd row
- 8 plots on the 3rd and 4th row
- 10 plots on the 5th and 6th row
- 8 plots on the 7th and 8th row
- 6 plots on the 9th row
- 3 plots on the 10th row
This makes a total of 69 plots within a large gardening spell area.
We want to ensure 80 units of distance between the center of each plot and will be planting the soil based in the order of the rows. For example, we start with row 1: plant right to left, then go up to row 2: plant left to right, then go up to row 3: plant right to left … etc.
Creating the 69 single layer plot
1. Find a large flat area in your home to start plant stacking.
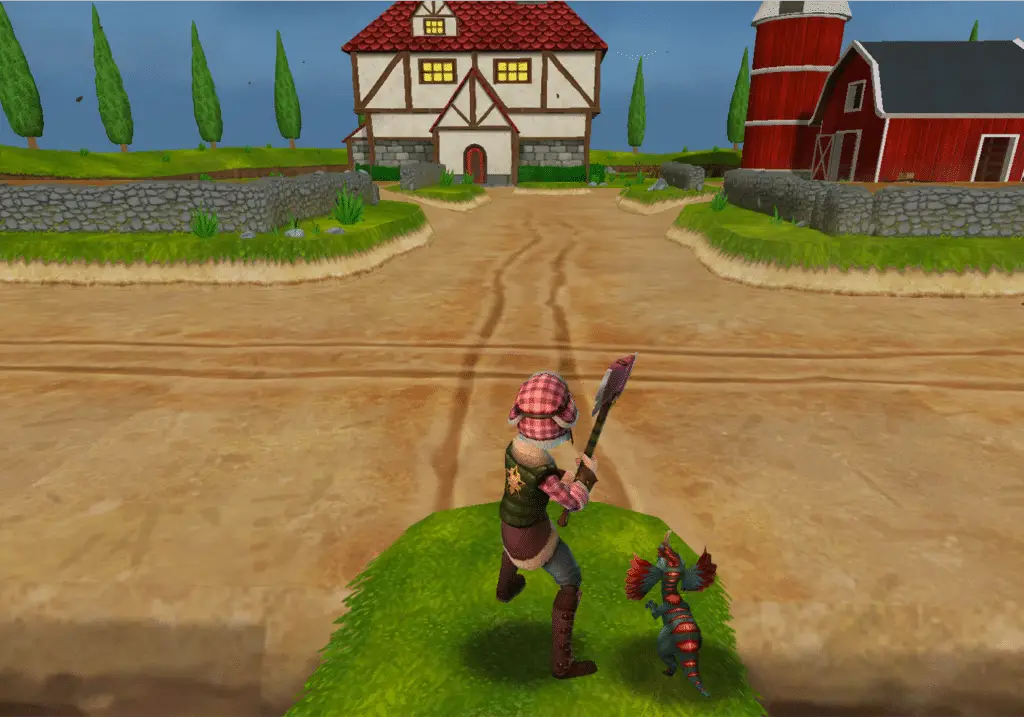
2. Place the low square table on the ground and go to your gardening spells to create a plot and grow soil.
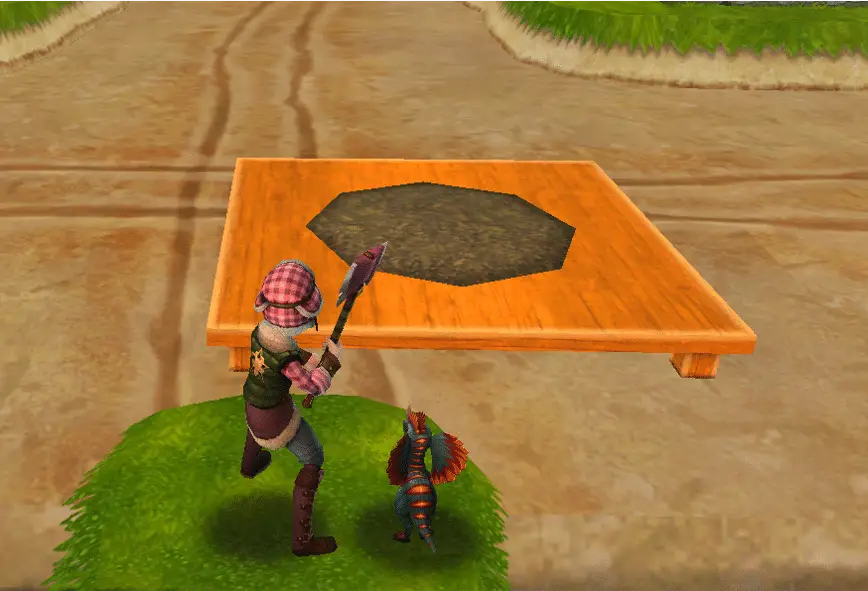
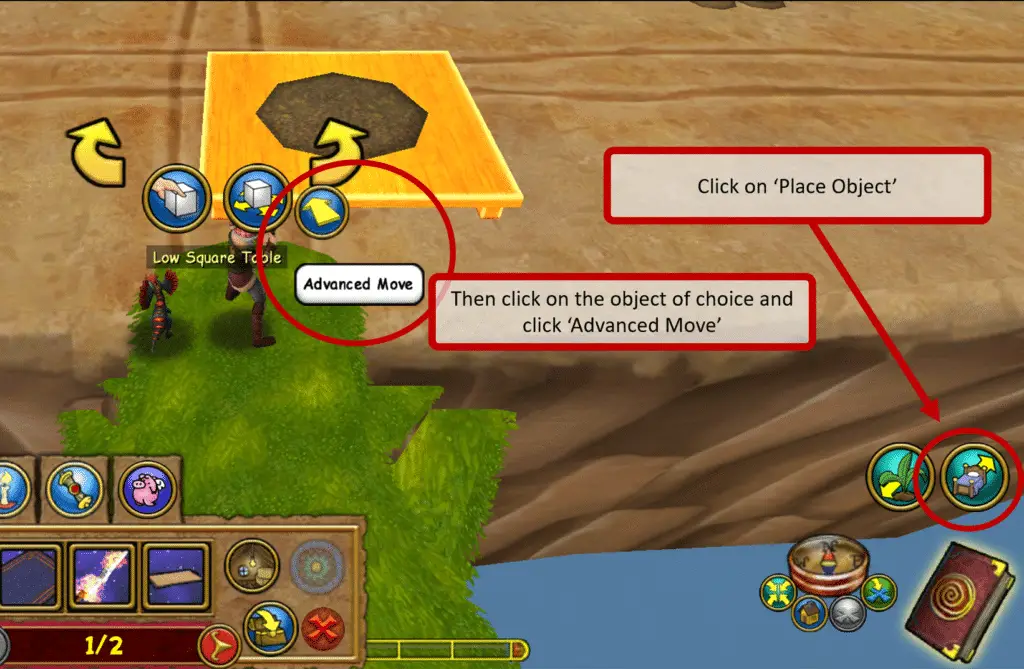
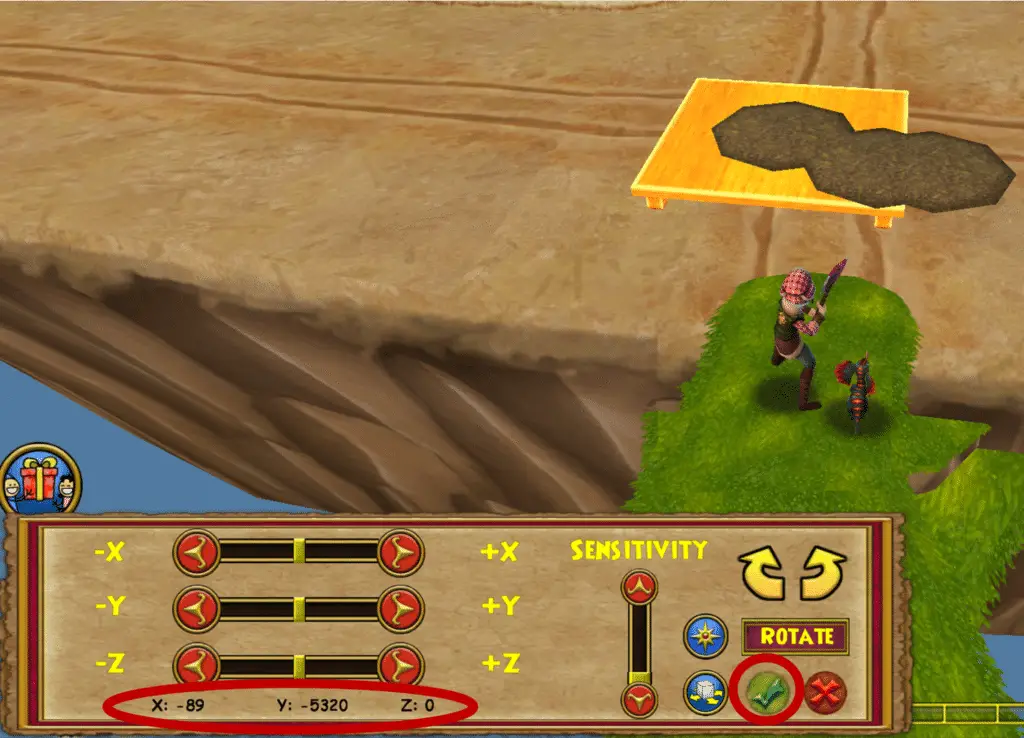
3. Click out of gardening and click on “Place Object”. Then click on the Low Square Table and click “Advanced Move”.
Make sure your advanced move settings are set to Absolute Movement and the lowest sensitivity level. This step is important because the measurements need to be exact in order for the plot to work properly!
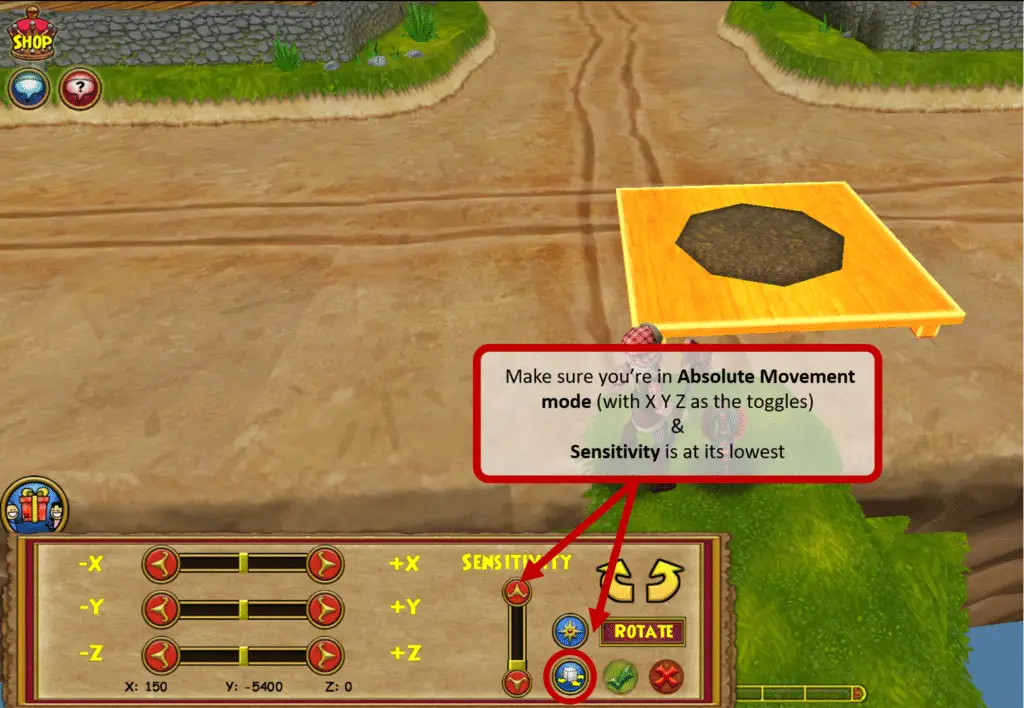
At the lowest sensitivity level, one click in any direction leads to a 20 unit movement. The plants need to meet a distance requirement of 80 units on the X axis and 80 units on the Y axis so all of our plants need to meet an 80 unit distance (or a 4-click distance requirement).
NOTE:
- Moving left and right uses X axis
- Moving up and down uses the Y axis
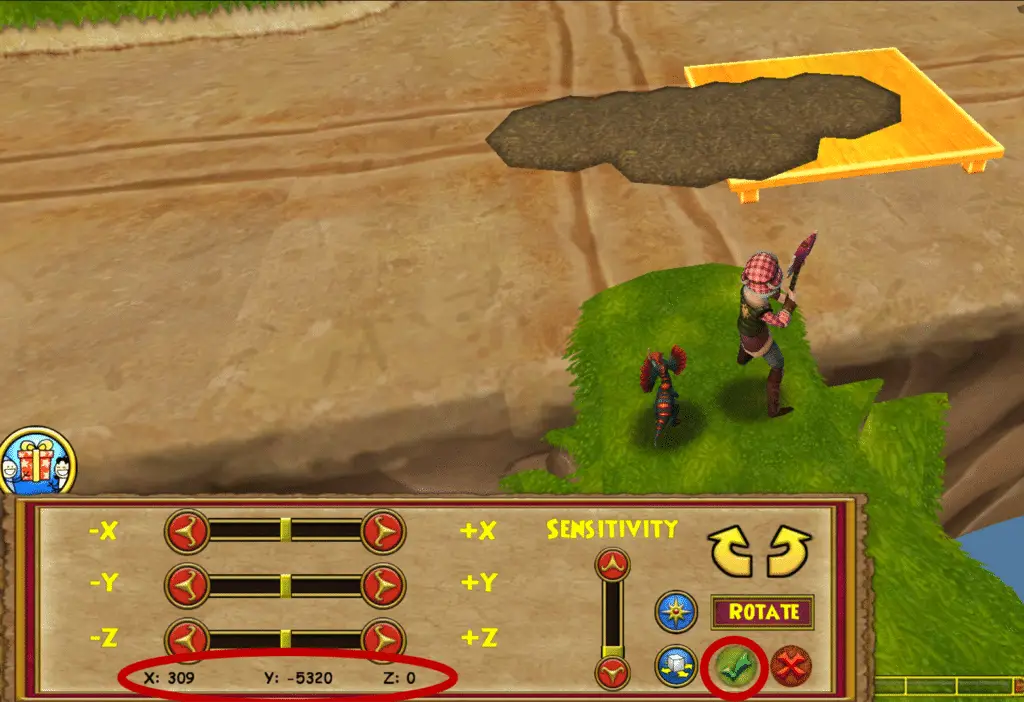
4. Click -X 4 times to move 80 units to the left. Click accept and then plant another plot on the table. Row one complete!
5. Moving on to row 2:
- Click +Y 4 times to move 80 units up
- Then click -X 8 times to move 160 units left (this is to move on to plot 1 out of 6 in row 2)
- Plot Soil
- Click +X 4 times to move 80 units to the right, plot soil (x5) to complete a row of 6 soil plots
6. Row 3:
- Click +Y 4 times to move up
- Click +X 4 times to move to the right
- Plot Soil
- Click -X 4 times, plot soil (x7)
7. Row 4:
- Click +Y 4 times to move up
- Plot Soil
- Click +X 4 times, plot soil (x7)
8. Row 5:
- Click +Y 4 times to move up
- Click +X 4 times to move right
- Plot soil
- Click -X 4 times, plot soil (x9)
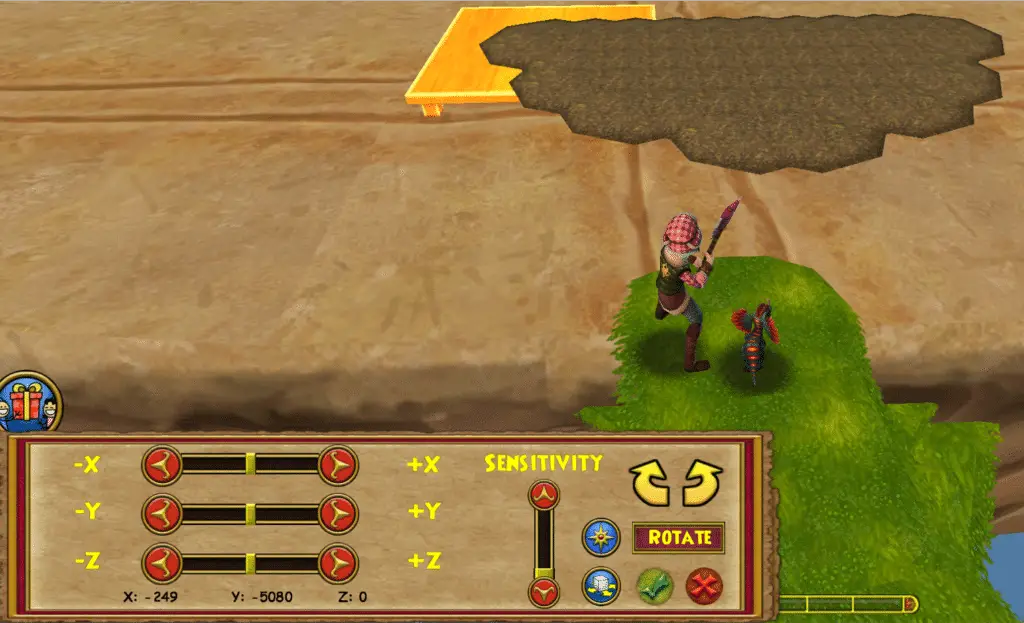
9. Row 6:
- Click +Y 4 times to move up
- Plot Soil
- Click +X 4 times, plot soil (x9)
10. Row 7:
- Click +Y 4 times to move up
- Click -X 4 times to move left
- Plot Soil
- Click -X 4 times, plot soil (x7)
11. Row 8:
- Click +Y 4 times to move up
- Plot Soil
- Click +X 4 times, plot soil (x7)
12. Row 9:
- Click +Y 4 times to move up
- Click -X 4 times to move left
- Plot Soil
- Click -X 4 times, plot soil (x5)
13. Row 10:
- Click +Y 4 times to move up
- Click +X 6 times to move left (because we’re building 3 plots)
- Plot Soil
- Click -X 4 times, plot soil (x2)
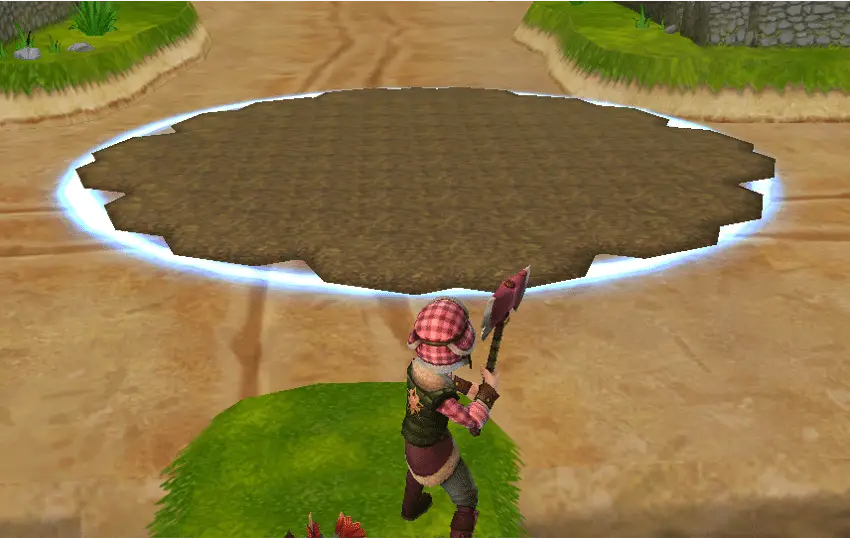
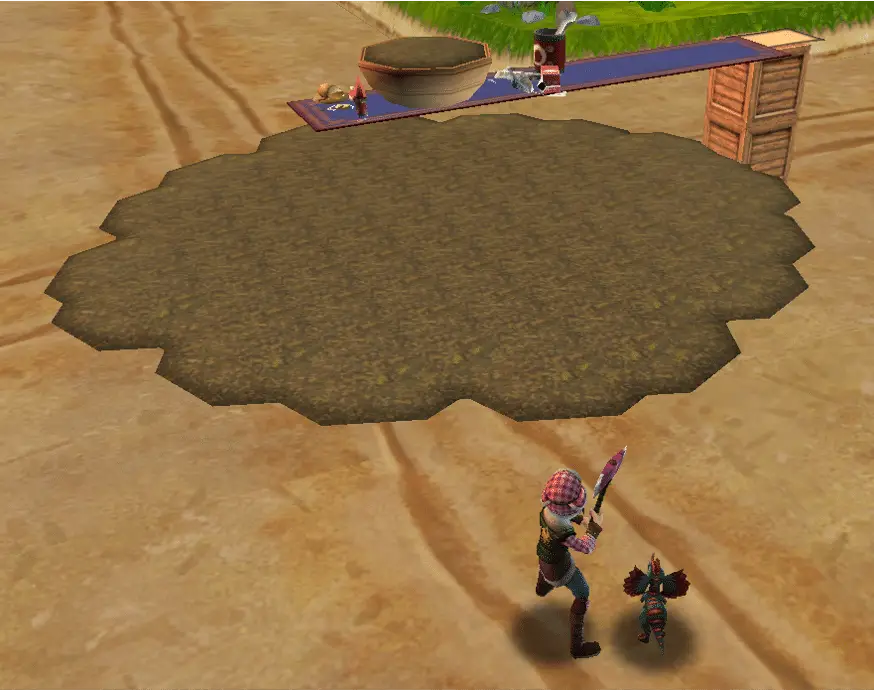
You’re now done creating your 69 soil plot! It should look like the image below and fit into the large spell ring like so:
Now, let’s place your plants’ likes. For the likes to reach all of the plants in the plot, we need to place the items at the center of the plot.
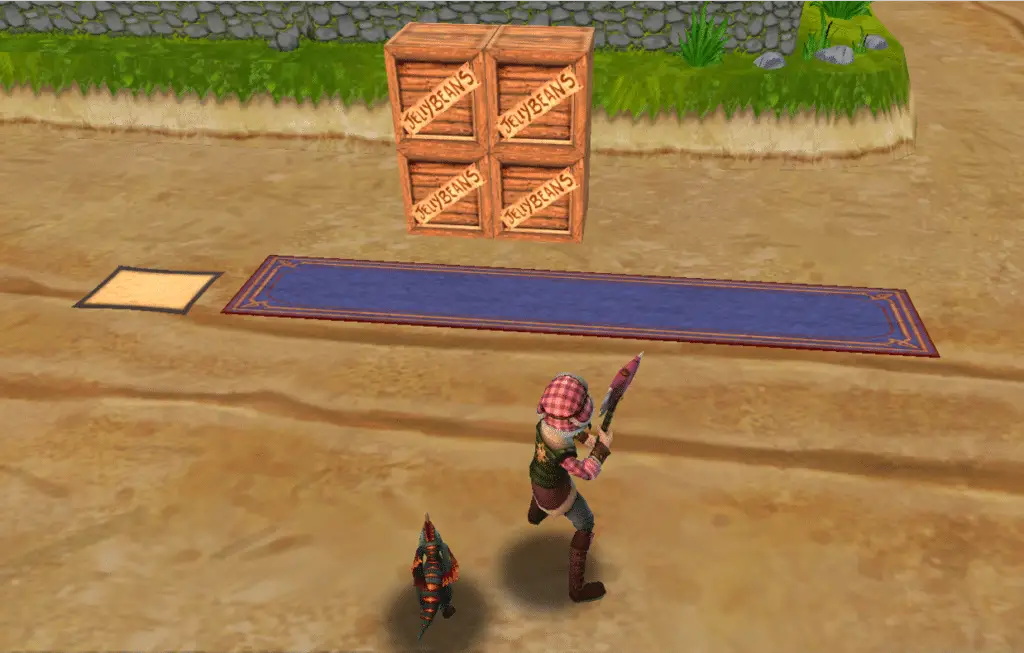
14. Place your crates in a 2 by 2 format (shown below) along with placing your long blue runner and tatami mat on the side.
15. Place the Tatami mat on the long blue runner. Then, click on the tatami mat, and move the object onto the crates. You should notice that the long blue runner is attached to the tatami mat now.
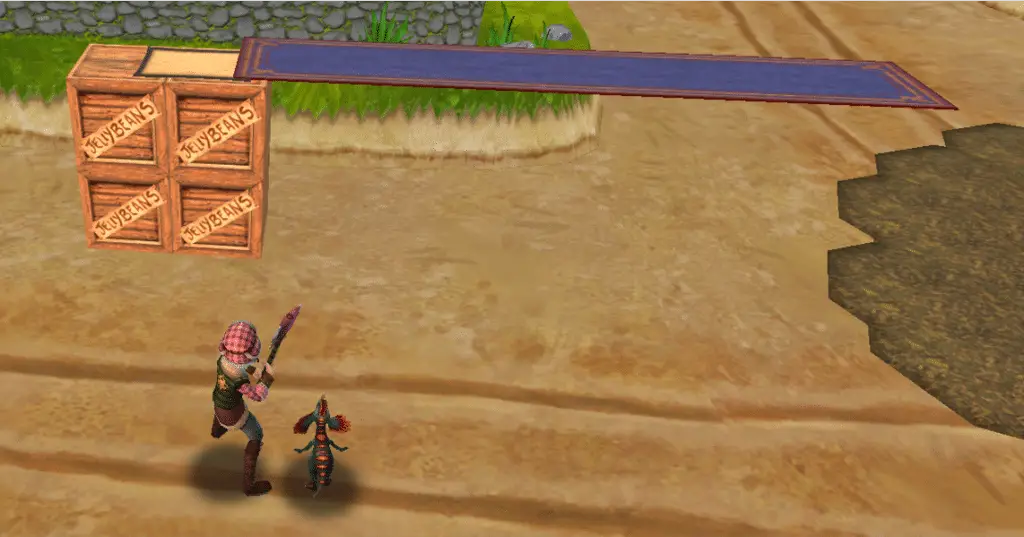
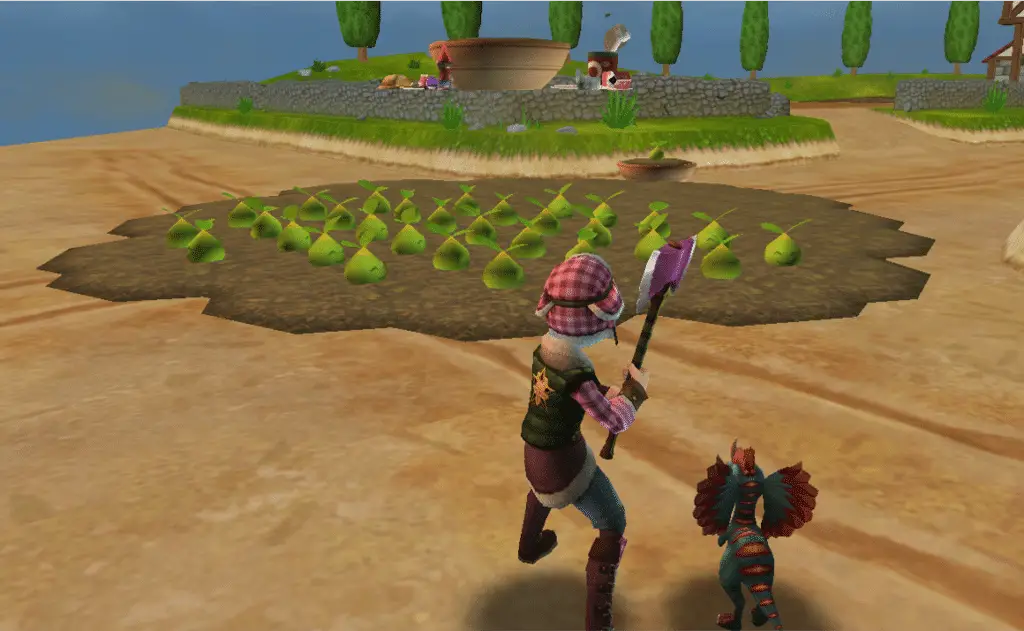
16. Move the column of crates (the mat and blue runner should follow) and position the long blue runner in the center of the plot. You can now place your plants’ likes on top of the runner (make sure they’re centered!)
17. Pick up your crates and you’re done! You can officially begin to plant your seeds.
Frequently Asked Questions about plant stacking
Can I plant more than 69 plots for this plant stacking method?
You can plant more than 69 plots but the large area spells only tend to a maximum of 69 plants at a time. Unless you have the gardening treasure cards like Flood or Flute Symphony that target all outdoor plants, you’ll be left with some plants within the plot that are left uncared for.
Where can I get the plant all spell?
You can get the plant all spell from Roger the Shrubber (but you need to be at least rank 15 to purchase the spell!) Other alternatives include getting the TC version, but they are rare to come by.
Did you like this guide? Check out our other guides here:



I don’t have plant all tc. When I plant by manual way I cannot plant all my plants on all plots, you have to have plant all spell?? Or did I do something wrong
Hey Sandra, you can manually plant all your plant by planting from the bottom up. So you can follow the same process as this guide and plant from rows 1 to 10
I’m having this same issue, but only with the small plots. I did mine mixed with some plots of each size, and I know they’re all placed correctly but if I plant a seed in a small plot then I can only plant in one of the adjacent plots, and there doesn’t seem to be any pattern to it. I can still cover way more plants with a single AOE spell than I would normally, and the medium and large plots are all full so I’m just going to deal with this glitch until I can get the plant all spell.
How does using large plots affect the distance requirement between plots?
it doesn’t. the seeds just need to be 4 clicks apart (on lowest sensitivity). the medium and large plots will overlap each more, but the center is the same distance apart no matter the plot size. you can have different size plots together in the same arrangement if you are working with compatible seeds (likes and needs).
I would suggest two possible improvements. One, put flagpoles at the corners, so you can accurately cast the spells to hit all the plants, which can be difficult with floating dirt. Alternately, before you start adding the garden plots to the table, lower the table into the ground until it vanishes, then bring it back up one space. Then the plots will all be at ground level.
Noted, thanks for sharing
another option would be to use something flat to place soil instead of the table. i use the shaman rug, but i expect there are many other flat thing that would work.
This is a wonderful tutorial! You did a fantastic job of organizing all the details and presenting them so clearly. Kudos! It’s the most well-presented I’ve seen. A couple questions though, I’m curious why you are floating the plots instead of placing them right on the ground? I placed mine right on the ground and didn’t have to bother with the table. Is there an advantage to floating them? Also, I buried my plant likes underground so they are out of the way. Another step that might be easier as you don’t need the long blue runner or anything else. Just use advanced moves and sink them below the garden.
Hi, I have a question. At one point I can somehow only place the soil under the table. No matter what I do, it doesn’t go on the table. I’m in the middle of row 5 and it’s worked for the others so far…
Can someone help me?